
Good to WOW: Layer Masks
a repost by ashley sisk of ramblings and photos
Earlier this year, I started a project with Jill Samter called Good to Wow (or Shoot and Edit). Every Monday morning, Jill posts a SOOC (straight out of the camera) shot and tutorial. Every Thursday morning, I will have my SOOC shot fully edited with a tutorial for you to follow.
I'm going to keep it pretty simple at first so we can build on the learning each week. Although I tend to work within Adobe CS5 (Photoshop), Photoshop Elements and Adobe Camera Raw...it does not mean that you have to use the exact same program. I hope you'll be able to take the concepts and apply them in the program you feel most comfortable using. Click HERE for all the details and upcoming prompts/themes.
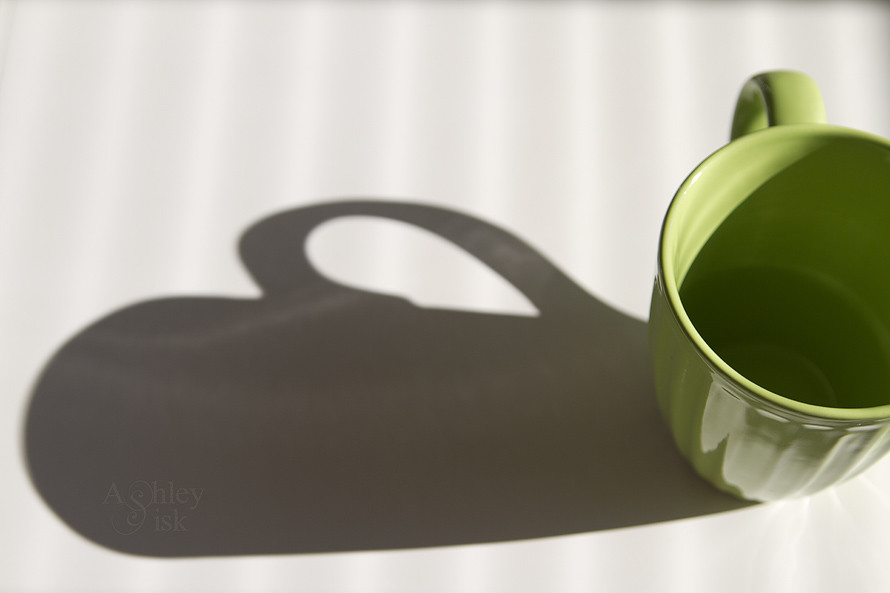
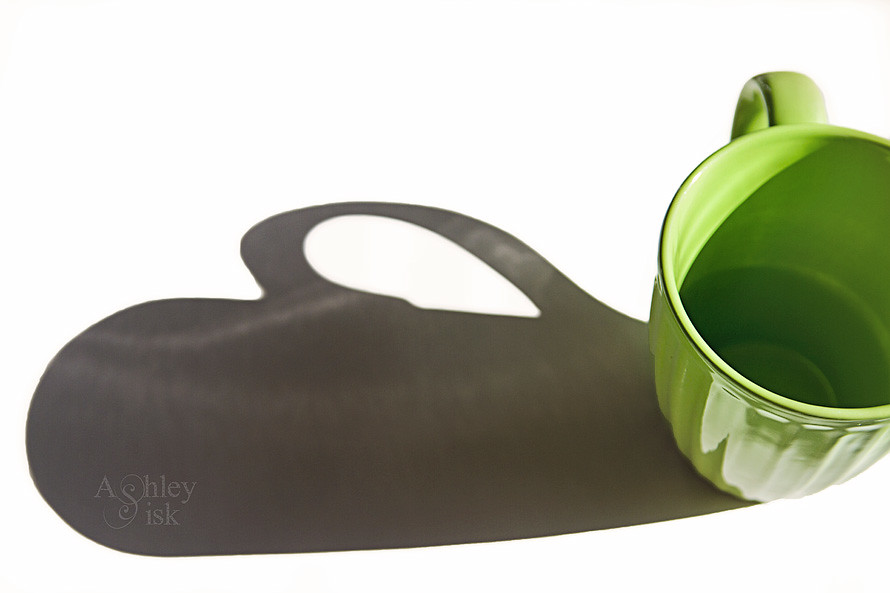
Here is my SOOC shot:
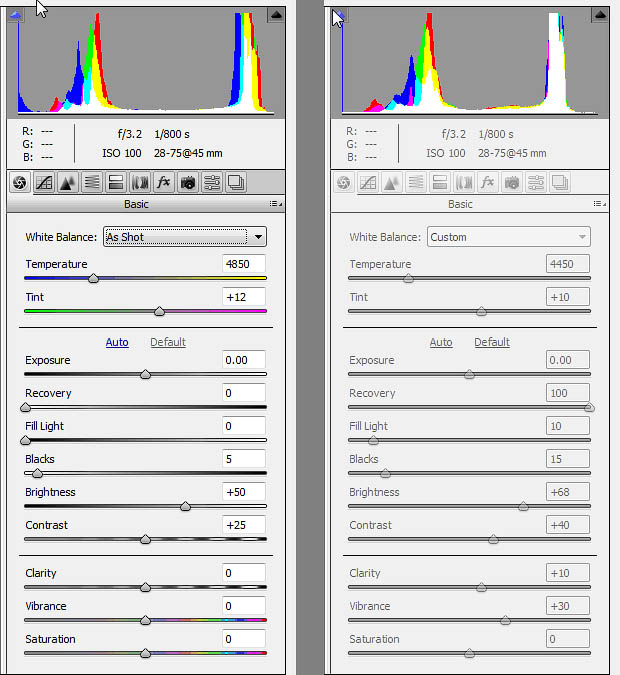
Building on what we learned last week (Week 1: Edit, previously shown in my last Muse University post: HERE), I started this edit in Adobe Camera Raw. Regardless of what editing program you're working in, you should have some of the basic functionality that Adobe Camera Raw offers. Below, I've copied my SOOC data and the revisions I made in Adobe Camera Raw. Here's what I did:
- Created a custom white balance by selecting the white of my dining room table with the eye dropper.
- Pulled the recovery slider up all the way.
- Gave myself a little bit of fill light.
- Increased my blacks a bit.
- Increased my brightness.
- Increased my contrast.
- Increased my clarity.
- Increased my vibrance.
Just making those few adjustments creates a nice clean edit (although I'm not sure I like it much more than my SOOC). I've included my ACR edit below. Again, if you are new to editing, I want you to continue working with the exposure, brightness and contrast within your editing program.The smallest tweaks can make a wonderful difference so don't feel as though you have to go to any extremes.

Beyond my edit in Adobe Camera Raw, I brought my photo over to Adobe CS5 (also known as Photoshop). I thought it would be helpful to build on the steps I shared with you last week. So...this week, I'd like to introduce the concept of using LAYER MASKS.
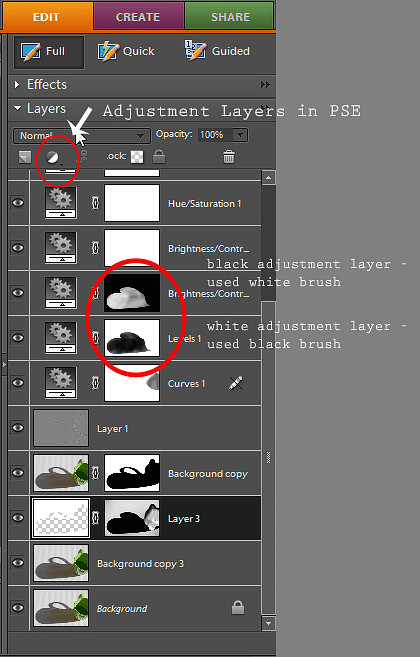
Layer masks are a great way to concentrate the adjustments of a layer on one aspect of the photo. A black layer mask will hide all adjustments made to a layer until a white brush is used to paint on the effect. A white layer mask will reveal all adjustments made to a layer - a black brush can be used to paint off the effect. Come again?
- BlACK layer mask = Use WHITE brush to paint on.
- WHITE layer mask = Use BLACK brush to paint off.
I still haven't learned how to make video tutorials (just haven't had time), but I found a bunch of videos on YouTube that explained how to use layer masks (FYI: YouTube is an excellent source for video tutorials). Gimp Tutorial: Layers and Layer Masks:
Now, for Photoshop Elements, most of the videos I found on YouTube worked with fake layer masks. I personally feel that this approach is a bit confusing. I find it much easier to work with a Layer Mask action. Rita over at The Coffeeshop Blog offers an incredible layer mask action for free. Click HERE to download her action (if you need instructions for downloading and installing actions, click HERE).
Alright, now that you have all the right tools, let's get started. Although I performed my edit in Adobe C25, most of my steps can also be performed in Photoshop Elements. Here are my steps:
Alright, now that you have all the right tools, let's get started. Although I performed my edit in Adobe C25, most of my steps can also be performed in Photoshop Elements. Here are my steps:
- Created a duplicate of my background. I applied a high pass filter (go to FILTER [at the top of your screen]>Other>High Pass Filter). I typically apply the high pass filter at a radius of 15 pixels. I then applied a soft light blending mode to the layer. If you missed it last week, this is my #1 favorite trick to make the details of your image pop. You can lower the opacity if needed and/or use a layer mask to erase part of the effect.
- Created a new adjustment layer - CURVES. If you are in PSE, Curves Adjustments are not a default setting. However, like the layer mask, you can download an action to simulate the effect. I recommend GRANTS TOOLS for Photoshop Elements. He also includes a layer mask action. I will tell you that I prefer a manual adjustment when working with curves - the auto controls aren't always accurate.
- Created a new adjustment layer - LEVELS. In this case, I pulled the left side (shadows) of the graph to a 20 to increase the darkness of the shadow. I then pulled my mid-tones (the middle bar) up to a 1.32 to brighten up the coffee mug. I used a layer mask to erase some of the adjustment from the shadow.
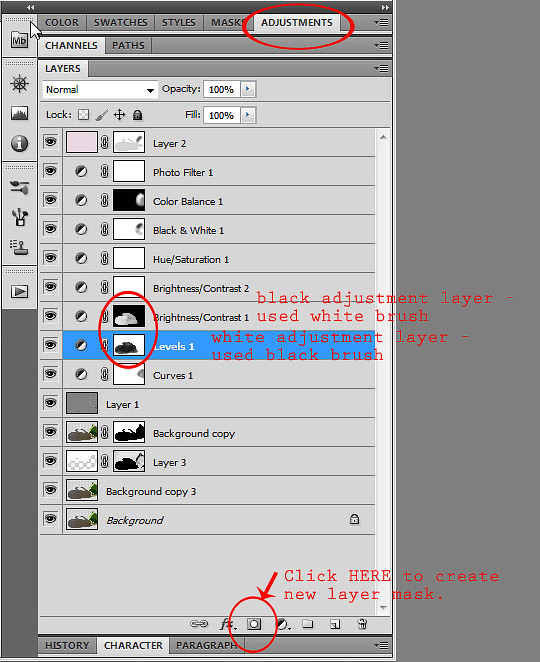

- Created 2 new adjustment layers - BRIGHTNESS/CONTRAST. In one I focused on the coffee cup and in the other, I focused on the shadow.
- Created a new adjustment layer - HUE/SATURATION. I toned down the yellow (it's habit).
- Created an adjustment layer: BLACK AND WHITE (in Photoshop Elements, you'll want to use a background copy then go to Enhance>Convert to Black and White). I used an lighter preset and then lowered the opacity to 10%. Let's be honest, I didn't really need this adjustment, but I was playing with all of my options.
- Created a new adjustment layer - COLOR BALANCE (this adjustment layer is not available in Photoshop Elements, but you can do something very similar by adjusting your Saturation).
- Create a new adjustment layer - PHOTO FILTER: warming filter.
- Created a new layer and filled it with a soft pink - set the blending mode to screen and lowered the opacity to 8%.
So... I may have gone a little overboard. I certainly could gone through fewer steps but I want to encourage you to experiment with your adjustment layers and also experiment with layer masks. It is not necessary for you to follow my exact steps.
I will point out that I left out a couple of steps. Once I got through my adjustment layers, I realized that my background was off. I wanted a clean white background, so I went back to my background layer and created a new copy. On that copy, I used my quick selection tool (if you're not familiar with all of your tools, CLICK HERE) to select my white background. I (think) clicked CTRL+J (command+J for mac users) to separate the background into it's own layer. I then filled it with white paint. I used a layer mask to really clean it up. This took much longer than it ever should have, but I do like the end result. I'll have to figure out a better way to demonstrate that approach for a later date.
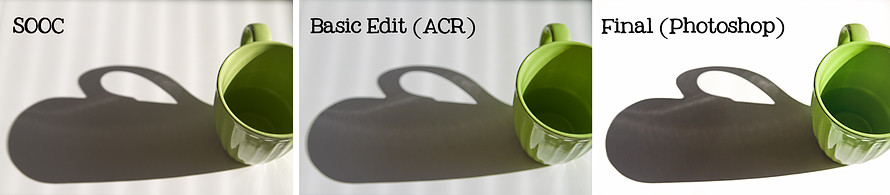
With that said, I have clearly made your head spin. I've included my SOOC with both edits below. What do you think?
_______________________________
repost by ashley
Join us every weekend for a new muse university post!
If you would like to provide a post for this series, please contact kat [at] kateyeview.com
3 comments:
Thanks Ashley! I always enjoy seeing the editing process and how someone else chooses to edit an image. That's where the artist's vision comes in!
Wow, great write up. This is really helpful to me.
Going to be studying this Ashley, thank you!
Post a Comment
thank you for visiting. take a moment and say hi!