
Good to WOW: Basic Adobe Camera Raw
a repost by ashley sisk of ramblings and photos
Earlier this year, I started a project with Jill Samter called Good to Wow (or Shoot and Edit). Every Monday morning, Jill posts a SOOC (straight out of the camera) shot and tutorial. Every Thursday morning, I will have my SOOC shot fully edited with a tutorial for you to follow.
I'm going to keep it pretty simple at first so we can build on the learning each week. Although I tend to work within Adobe CS5 (Photoshop), Photoshop Elements and Adobe Camera Raw...it does not mean that you have to use the exact same program. I hope you'll be able to take the concepts and apply them in the program you feel most comfortable using. Click HERE for all the details and upcoming prompts/themes.
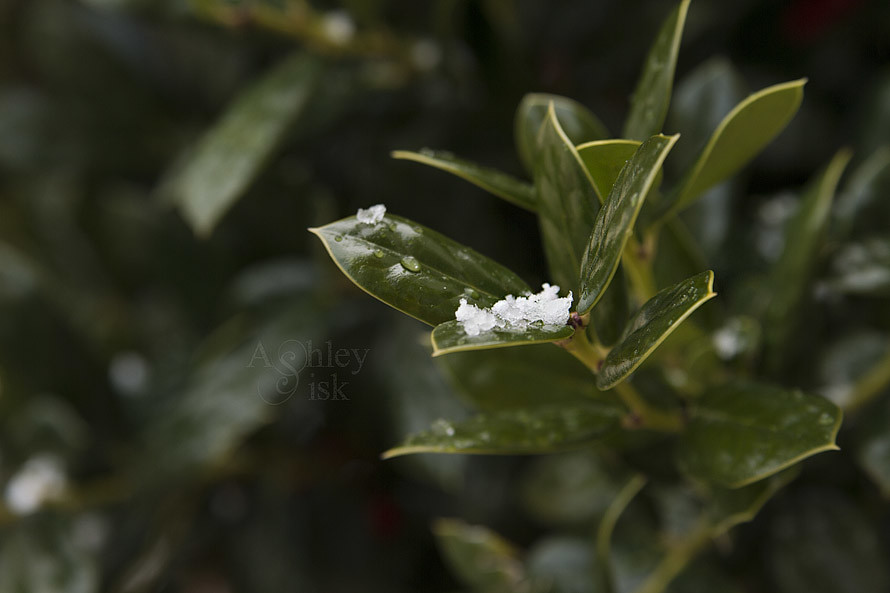
Here is my SOOC shot:
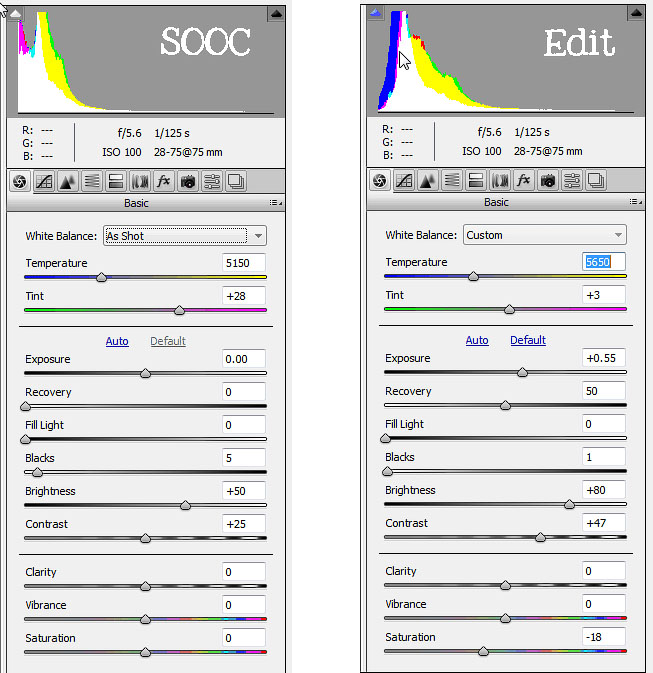
As I mentioned before, I wanted to start simple....so, I'm starting this edit in Adobe Camera Raw. Regardless of what editing program you're working in, you should have some of the basic functionality that Adobe Camera Raw offers. Below, I've copied my SOOC data and the revisions I made in Adobe Camera Raw. Here's what I did:
- Created a custom white balance by selecting the white of the snow with the eye dropper. I then tweaked it by eye.
- Bumped up the exposure just a touch.
- Pulled the recovery slider up.
- Dropped my blacks a bit.
- Increased my brightness.
- Increased my contrast.
- Decreased my saturation.
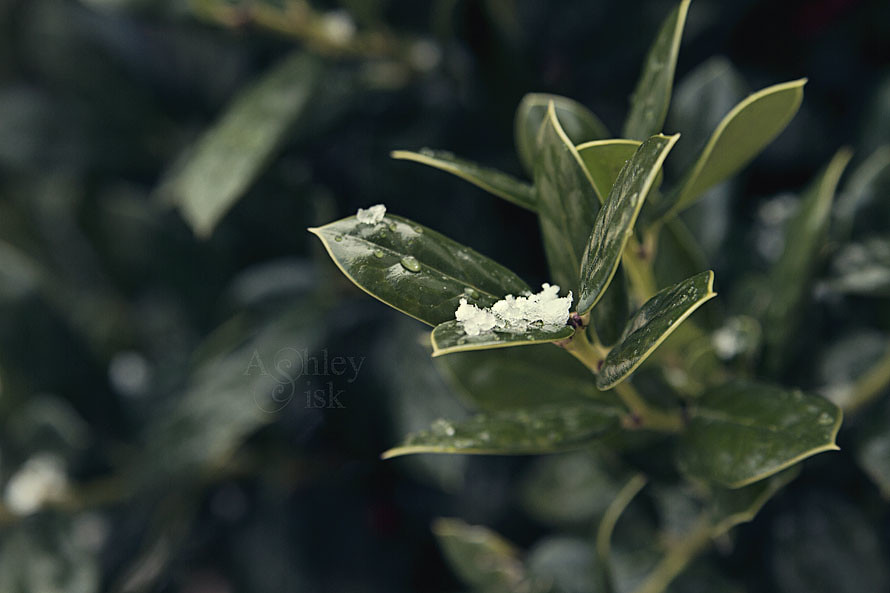
Just making those few adjustments creates a nice clean edit. I've included my edit below. If you're new to editing, I encourage you to try adjusting the exposure, brightness and contrast within your editing program.
I should warn you that most editing programs offer an "Auto" option. Sometimes selecting auto works perfectly but in this case, it over-exposes the snow and creates unnecessary noise as seen below...thus the reason that I performed a manual edit in Adobe Camera Raw.
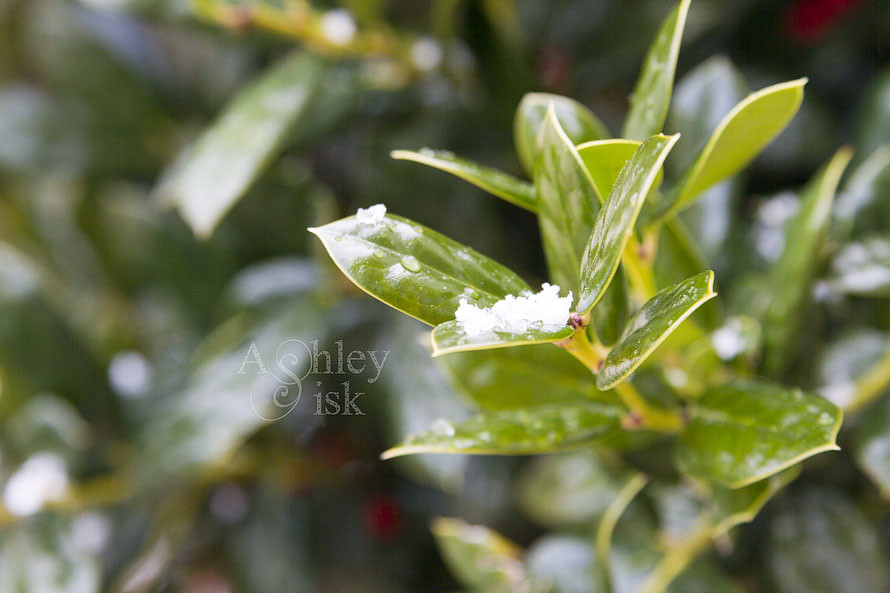
The auto edit actually reminds me of a conversation I had with one of my coworkers. He was of the impression that professional photographers have it made. In so many words, he claimed that all photographers require is a camera. He then claimed that very little editing is done because "photographers just have some sort of auto program that they send photos through." I suppose I could have jumped on my soup box, but I didn't bother. Had I simply put my photo through an auto edit, it would have been a waste. Anyways, enough of my rambling.
If you're interested in an advanced edit...keep reading.
Beyond my edit in Adobe Camera Raw, I brought my photo over to Adobe CS5 (also known as Photoshop). Most of my steps can also be performed in Photoshop Elements. Here are my steps:

- Created a duplicate of my background. I applied a high pass filter (found under FILTER at the top of the screen). I then applied a soft light blending mode to the layer. This is my #1 favorite trick to make the details of your image pop. You can lower the opacity if needed and/or use a layer mask to erase part of the effect (I'll touch on layer masks another week).
- Created a new adjustment layer - LEVELS. I pulled the left side (shadows) of the graph to a 5 - this makes my blacks just a tad bit darker. I normally pull the middle bar (midtones) up to a 1.38 to brighten up an image, but that was not necessary here.
- Created a new adjustment layer - COLOR BALANCE (this adjustment layer is not available in Photoshop Elements, but you can do something very similar by adjusting your Saturation). You can see my adjustments below:
- Created an adjustment layer: BLACK AND WHITE (in Photoshop Elements, you'll want to use a background copy then go to Enhance>Convert to Black and White). I used an infared preset and then lowered the opacity to 12%.
- Created an adjustment layer: BRIGHTNESS/CONTRAST. My brightness went to -1 and contrast increased to +8.
- Finally, I applied Totally Rad's Lux action at 70%. For a similar effect...you can create a new fill layer - fill it with a shade of cream or light pink, set the blending mode to screen and lower the opacity.
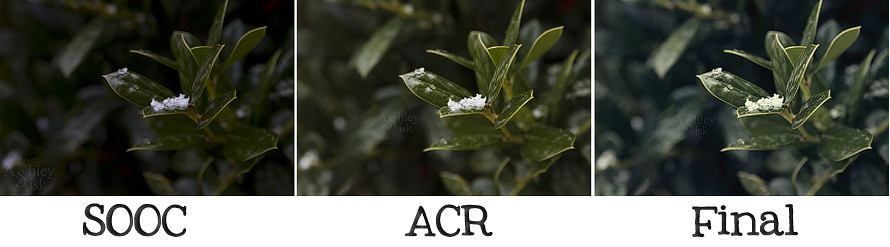
Let's see the three edits side by side:
Not to overwhelm you, but I always resize and sharpen for the web. I know there are a few freebie actions that do this for you, I prefer to use the unsharp mask. I'll touch on this another time but sharpening for the web can make a huge difference in how your images appear on your blog.
_______________________________
repost by ashley
Join us every weekend for a new muse university post!
If you would like to provide a post for this series, please contact kat [at] kateyeview.com
7 comments:
muse university rocks! very informative post. I almost always undo an auto edit in elements as I'm rarely happy with the results, thanks for confirming what I've been experiencing.
A very well composed tutorial. I often wonder if people know how much work it takes to produce a post like this. Your "final" was certainly worth the effort!
Thanks so much Karen and Bonnie - the editing doesn't usually take that long (depending on what it is), but writing out the steps is sometimes time consuming. Have a great weekend.
I've been taking photos for a million years and reading articles on post production for half a million years and this is the clearest, most concise tutorial on basic editing I've ever read. Seriously well done.
Thanks for this post. I am looking forward to more info on resizing and sharpening for the web. I always see a difference in my photos when they are on my blog. And I get so confused when it comes to unsharp mask.
Ashley, thanks for the tutorial. Great job! So, much can be done in the editing process. I feel it is another part of making a photo your personal vision - bringing the art element to a capture.
Oh Ashley, I do love reading your university posts. So beautifully explained.Thank you.
Post a Comment
thank you for visiting. take a moment and say hi!